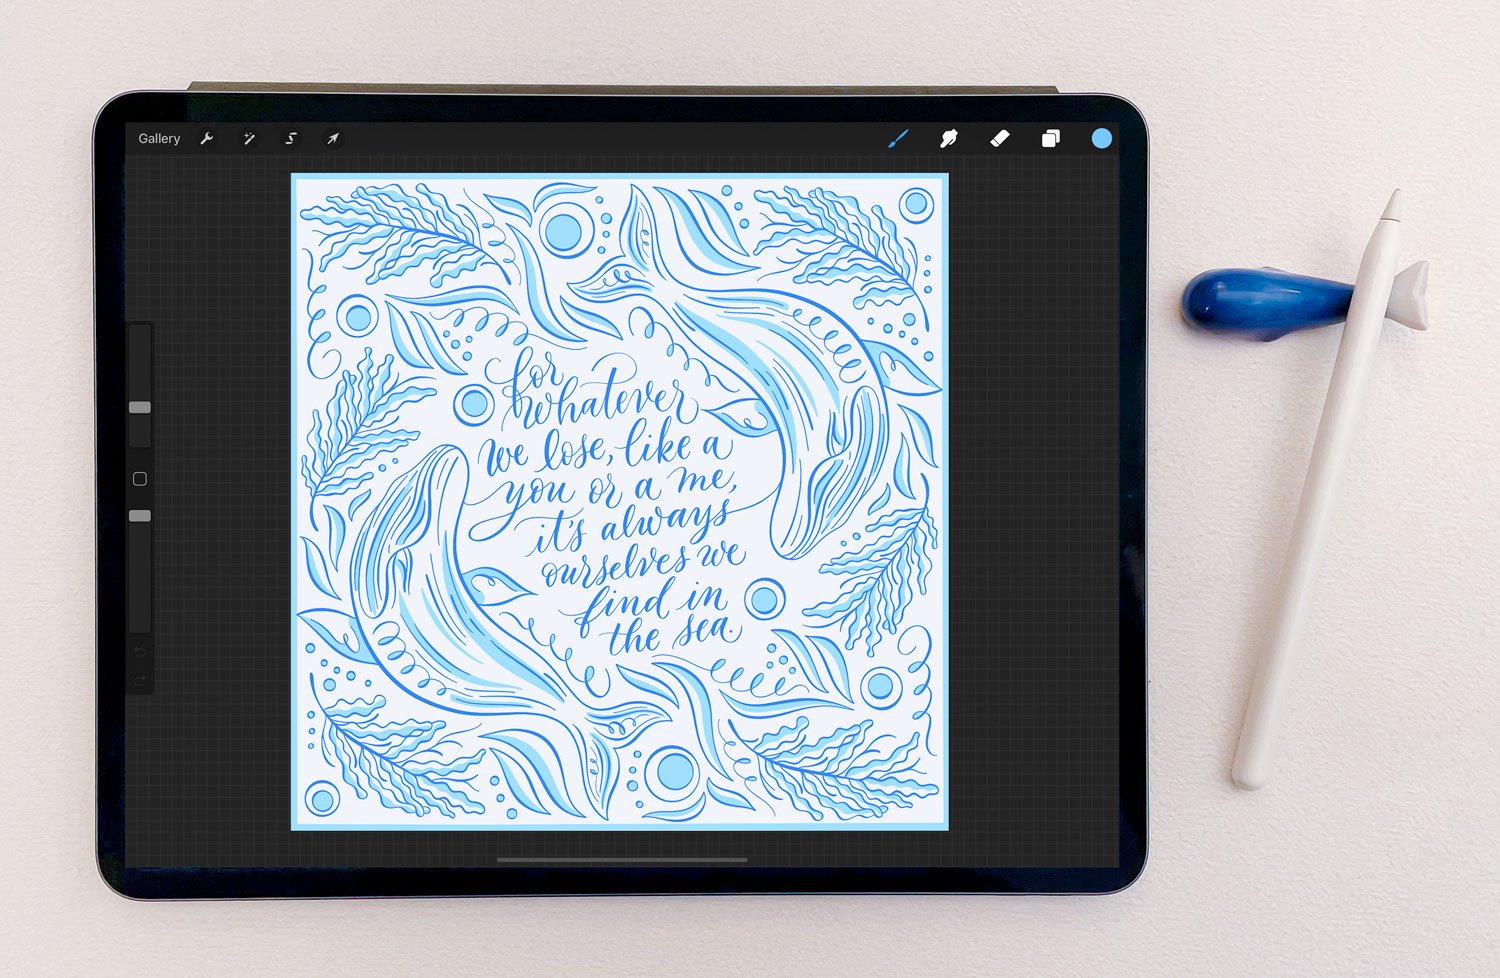
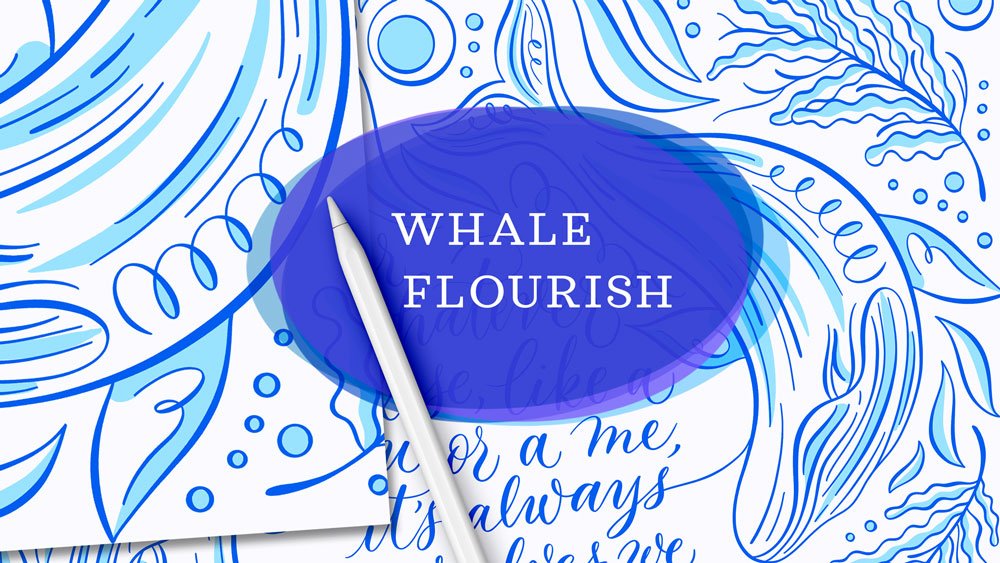
Calligraphy Whale Flourish Illustration
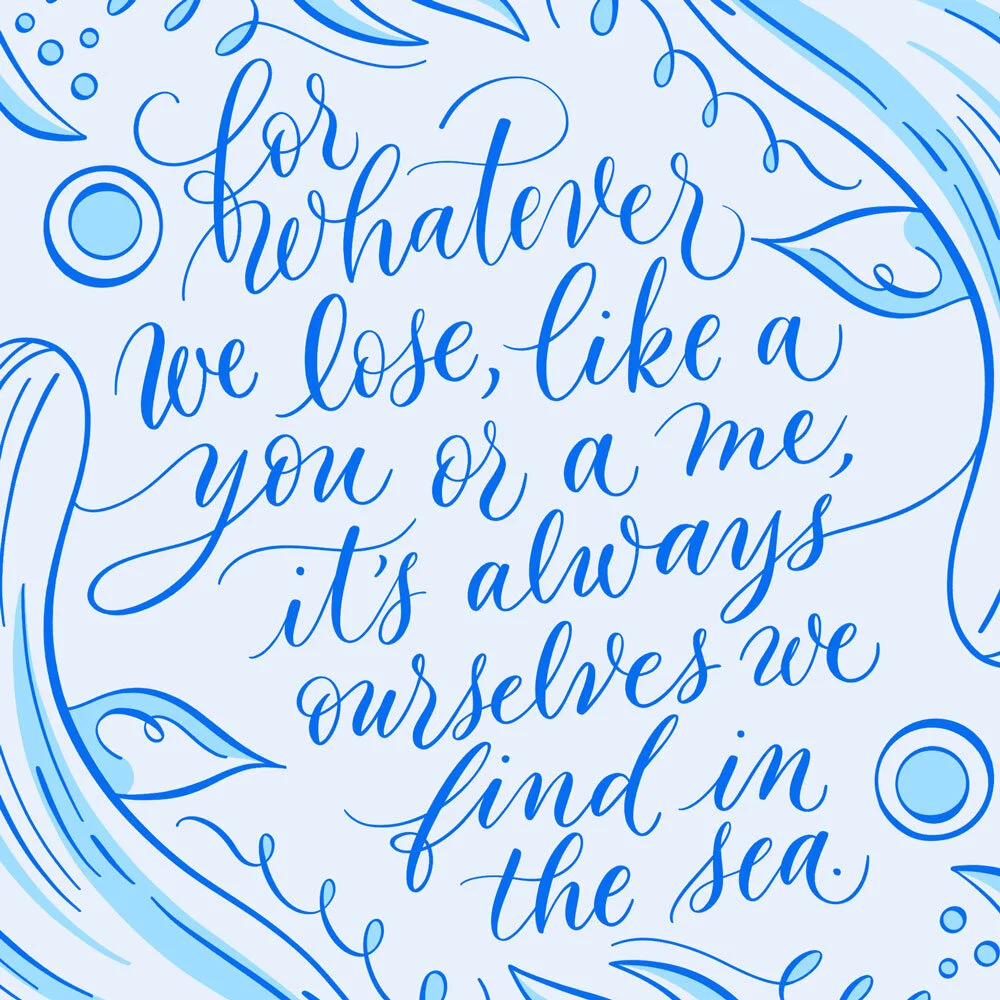
Zoomorphic flourishes—the practice of shaping animals out of calligraphic strokes—is a long tradition in the history of calligraphy. In the following tutorial, I show you how I create a whale illustration and modern calligraphy layout on my iPad. The intricate border is drawn with the help of Procreate’s vertical symmetry guides, and the lettering is a poem excerpt by e.e. cummings. Watch the video to see my start-to-finish process, and follow the written instructions below to make it yourself.
Watch the video tutorial:
Follow the written instructions:
Click an image to enlarge it.
Sketch the whale’s outline
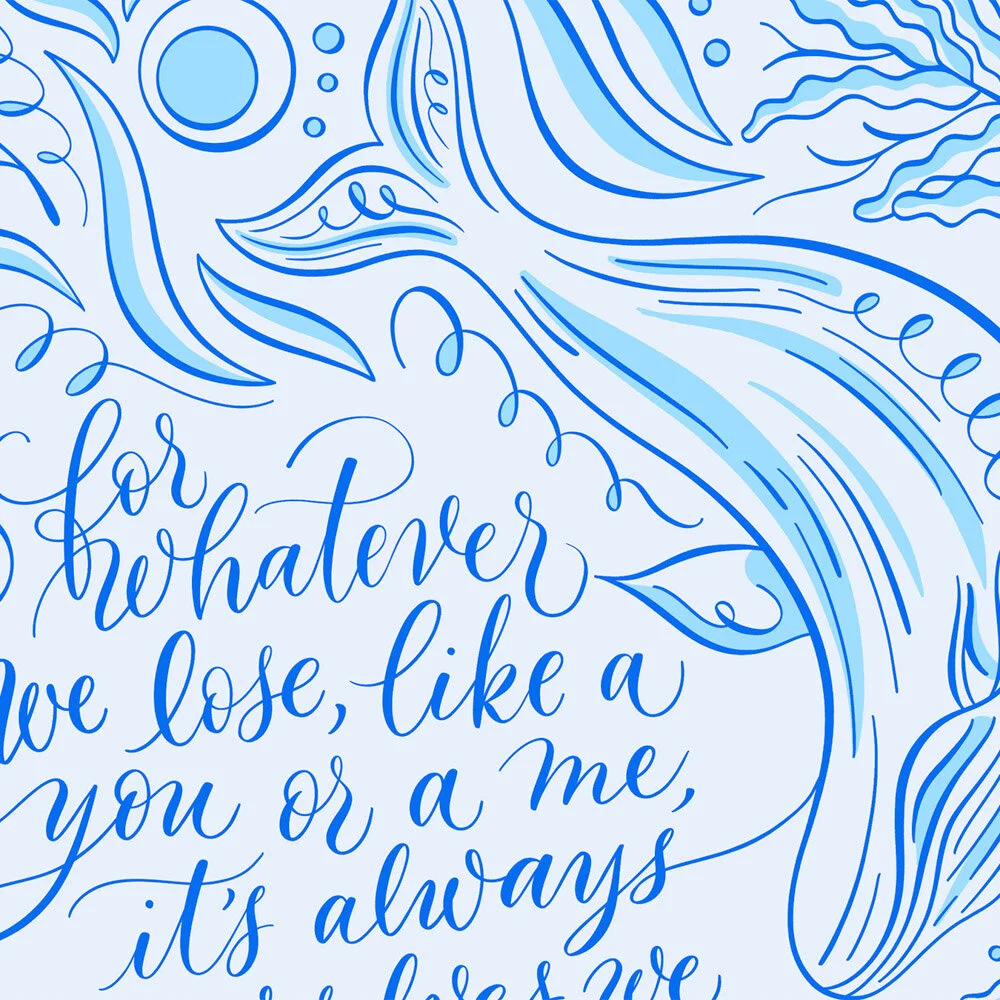
For an intricate illustration like this one, I like to start by sketching the primary drawing that I know I’ll use in the theme. In this case, that’s a humpback whale. (Whales are one of my favorite animals, so I thought no sea-themed design would be complete without them!)
I often sketch with pencil, however today I’m sketching with my Fine Point Calligraphy Pen, so I can play with pressure to get different stroke weights.
Start with the outline of the whale – the long, curved strokes that make up the back and belly. Don’t worry if they’re a bit squiggly! Humpback whales have lots of curves.
Add details: sketch seaweed and waves
When you’re happy with the general outline, add some wavy lines to the mouth, back, and tail, to differentiate those regions. For the eye, I have just added a thicker curved stroke, since humpbacks always look to me like they’re winking!
Next, sketch out some other sea-themed elements. I’ve chosen to draw a couple squiggly seaweed fronds, circular bubbles, and wavy shapes. All of these are reminiscent of the sea, and therefore support the theme of the primary illustration.
I’m also drawing in the center of my canvas as I work out the shape. However, I’ll move my sketch to the canvas’s corner when I’m done.
Turn on Procreate’s symmetry guides
Make a new, blank layer above your whale sketch.
Under Actions > Canvas, turn on Drawing Guide. Then tap Edit Drawing Guide right below it. In the Drawing Guide settings, select Symmetry in the bottom right, then tap Options. In this pop-up panel, choose Vertical, and make sure the two options at the bottom are turned on: Rotational Symmetry and Assisted Drawing.
Reposition your sketch and trace it with assisted drawing
Now the fun begins! Move your initial sketch so that it’s positioned in one corner of the canvas. I chose the upper right, but it doesn’t matter which corner you choose. Reduce the sketch’s opacity so that it’s the right transparency for tracing.
On the blank layer you created in the previous step, start tracing your sketch. I’m still using my Fine Point Calligraphy Pen.
Because of the symmetry guide settings, your drawing should be reflected across the canvas, to the opposite corner. (If it’s not, make sure assisted drawing is turned on by tapping your drawing layer and turning on Drawing Assist. The word “Assisted” should appear underneath your layer’s name.)
⭐ ⭐ ⭐ ⭐ ⭐
“I’m stunned by this brush kit! The pointed calligraphy pens mirror working with real, flexible pointed nibs.”
— Sarah Richardson, author, Copperplate Calligraphy from A to Z
Fill in the remaining border space with small illustrations and flourishes
With the primary element of the border traced, it’s time to move on the secondary elements. Fill in all remaining space around the canvas with more seaweed fronds, bubbles, wave shapes, and curled flourishes.
I don’t mind that the open space left in the center, where the calligraphy will go, is not a perfect circle or square. The organic shape is appealing to me, in fact, and further complements the watery vibe.
Sketch the calligraphy quote in pencil
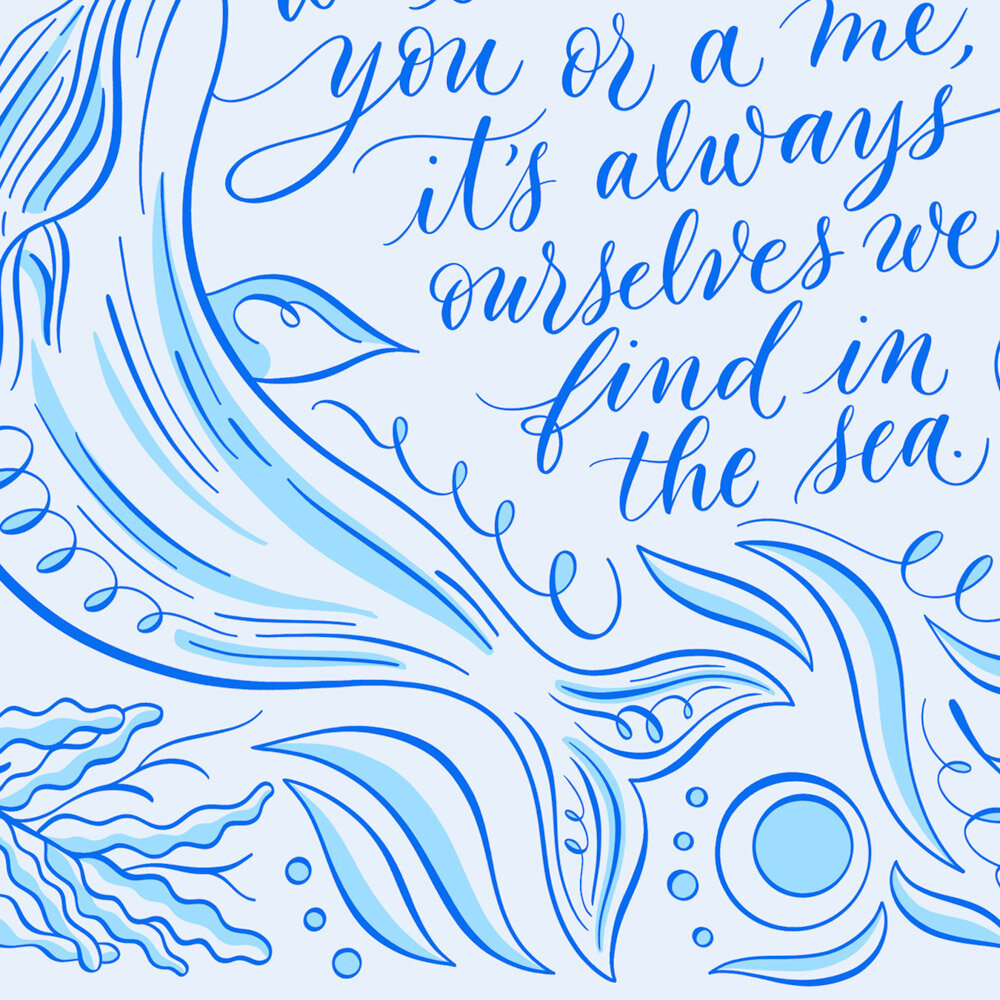
Using a pencil brush, I lightly draw in the first iteration of my calligraphy quote: “for whatever we lose, like a you or a me, it’s always ourselves we find in the sea.” (This is an excerpt of a poem by e.e. cummings.)
I’m not using any drawing guides here, so there is no uniform slant, baseline, x-height, etc. Again, I’m going for a very organic feel, so a wavy look to my lettering is actually my goal.
Re-trace the calligraphy sketch if needed
My first pass at the lettering allowed me to determine how the lines of text would be broken up through the space. I then went back over the sketch, again with pencil, to work out where the flourishes would go, how long the lines would be, and other spacing considerations.
Draw the lettering in a calligraphy pen
With the same Fine Point Calligraphy Pen I used for the illustrations – to keep the strokes cohesive throughout the whole drawing – I now trace my calligraphy sketch. I go very slowly to make sure I get smooth curves and consistent strokes. My Fine Point pen is highly pressure sensitive, so I’m able to create very high-contrast calligraphy, with hairline flourishes and bold downstrokes. These extra thick parts of the letters pop out of the illustration, assuring that the calligraphy is legible despite the intricacy of the entire composition.
Add color fills and highlights to the border
Make a new layer underneath your border drawing and turn on drawing assist by tapping the layer once, then tapping Drawing Assist. (The word “Assisted” should now appear underneath that layer’s name.)
Select a lighter color – in my case, pale blue – and begin coloring in portions of the border shapes. Since drawing assist is on, your coloring should again be mirrored across the canvas, so you’ll only have to color in half the illustration – Procreate will do the rest.
I am coloring half of each seaweed leave and wave shape, filling in the loops and circles, and drawing long highlight strokes within the whale. Have fun with this part. Just remember to keep zooming out to make sure you like the overall direction you’re going!
Recolor your calligraphy and illustrations
As my final step, I want to boost the vibrancy and contrast of the overall design. There are a couple ways to do this. One is to select new, brighter colors for each element, and apply them to the art one layer at a time.
Another simpler and more versatile method is to use adjustments. This requires that you work with a flattened piece of artwork, so I highly recommend that you start by making copies of all your art layers, then flatten those copies into a single layer.
Go to the Adjustment menu (the magic wand icon), and select Curves > Layer. Use this adjustment to boost the contrast. Then go back to the Adjustment menu and choose Color Balance > Layer. Play with the sliders to adjust the hues. Now have fun and experiment with other adjustments! I often like using Gradient Map, too, which is a cool way to quickly apply a new palette to an entire composition.
Click to enlarge:

Additional Resources
Brush used:
Pointed Calligraphy Pen from my Ultimate Lettering and Calligraphy Procreate Kit.
iPad tools used:
More Procreate calligraphy illustration tutorials:
Procreate for Absolute Beginners — Two-hour Skillshare class


If you found this tutorial helpful, please consider sharing it with others. That’s the best, free way to support artists you appreciate.
You could also buy me a coffee, if you wish.