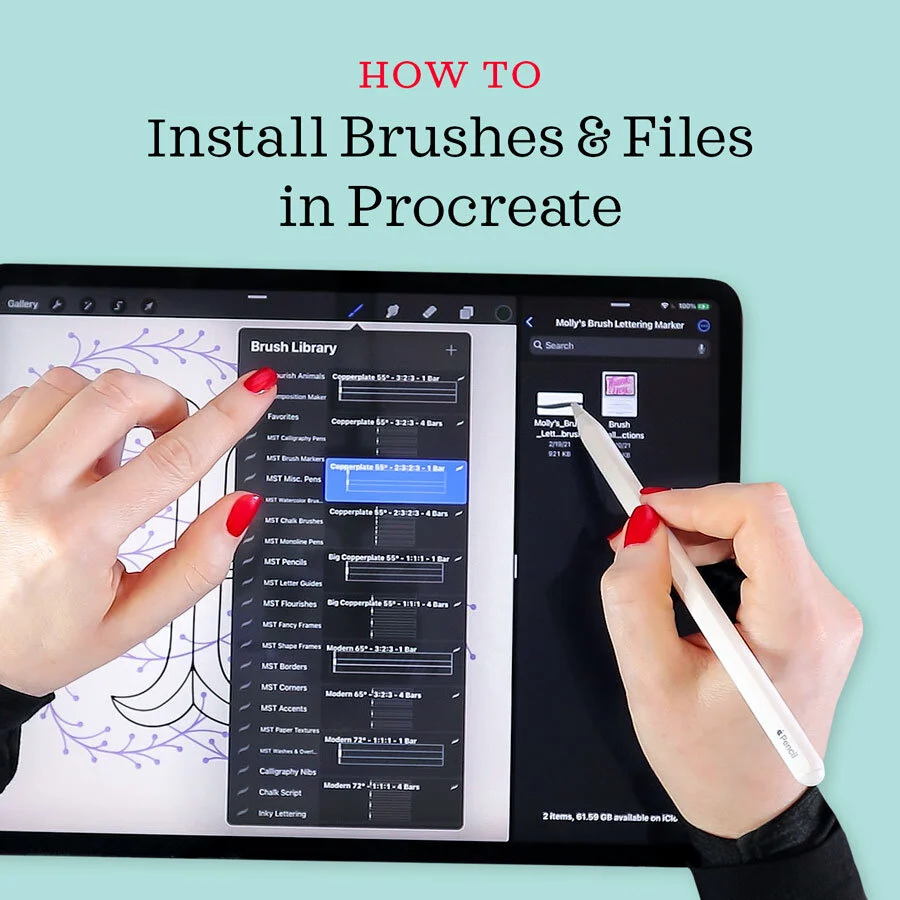
How to Install Brushes & Files in Procreate
I earn small commissions for purchases made through links in this post. Proceeds help me to continue producing free content.
Today I’ll walk you through the simple process of installing brushes and files in Procreate. You will learn how to work with zipped downloads, brush sets, color swatch files, and Procreate files.
This lesson is one of the 38 lessons from my newest online course, Procreate for Absolute Beginners. If you enjoy today’s lesson, and want to see 37 more lessons about various Procreate functions, I urge you to enroll in the course. Procreate for Absolute Beginners is a class on Skillshare, which you can watch with a Skillshare Premium membership. (To get a 4-week free trial to Skillshare Premium, and access to all the thousands of classes the platform has to offer, just click here.)
Transcript
Brush file types
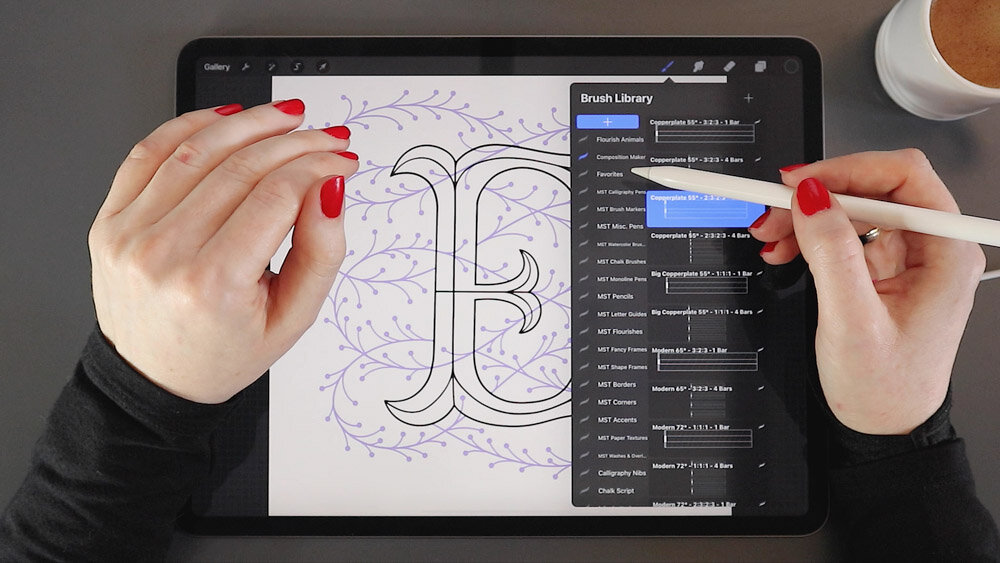
In Procreate there are two types of brush files. You have single individual brushes which have the file extension .brush. Then you have brush sets, or brush libraries, which have the file extension .brushset. When you see a brush set, it means that it’s one single file containing more than one brush. Oftentimes, it’s a lot more than one. For example, this is my Calligraphy Composition Maker for Procreate. It contains lots of brushes, dozens of them, in fact. But if you get this and install it in Procreate, it would be one single .brushset file which you would import, and then all the brushes would appear organized into their own little folder.
Save files to the cloud
Individual brushes and brush sets are installed in exactly the same way.
Very often, when you download brushes from an online marketplace or an individual product creator, they’re going to come as a zipped folder. That’s because you usually get additional files along with the brushes, such as PDF instructions, sample graphics, licensing details, etc. If that's the case and you find yourself with a zipped file, you’ll first need to download it to a place where you can unzip it and then make sure the relevant files are in the cloud, where you can then access them via Procreate. Obviously, the most convenient method would be to save your zipped file directly in the cloud.
I personally offer a bunch of free downloads of Procreate brushes and practice files for lettering artists. So I'm here at Molly’s Lettering Toolkit to use it as an example, because I'm one of those product creators who provides zipped files.
Unzip your downloaded file
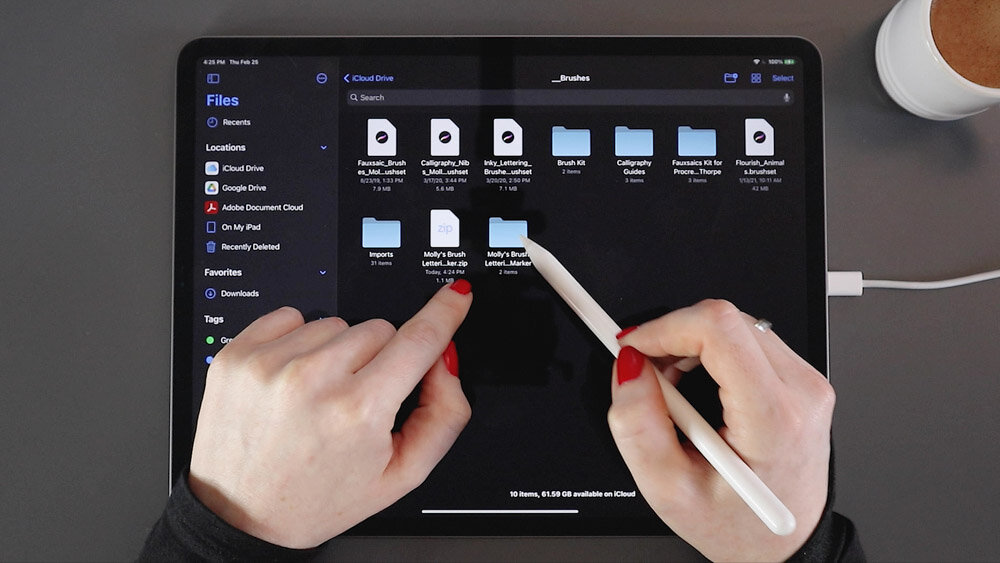
Let’s download my free Lettering Marker Brush. Now, when it’s done, it's asking where I want to open it, so I’ll click “Open in” and save to Files. Here, I can navigate to exactly where in my files I want to place it. I have a whole folder of brushes in my iCloud, so I'll put it right there.
Here I have my zipped file, and all I have to do is tap it once and Files automatically unzips it for me. Once it's unzipped, the zipped file itself remains and you get a brand new, unzipped version with the same title. That folder contains the items that were in your zip folder.
Set up your iPad toolbar
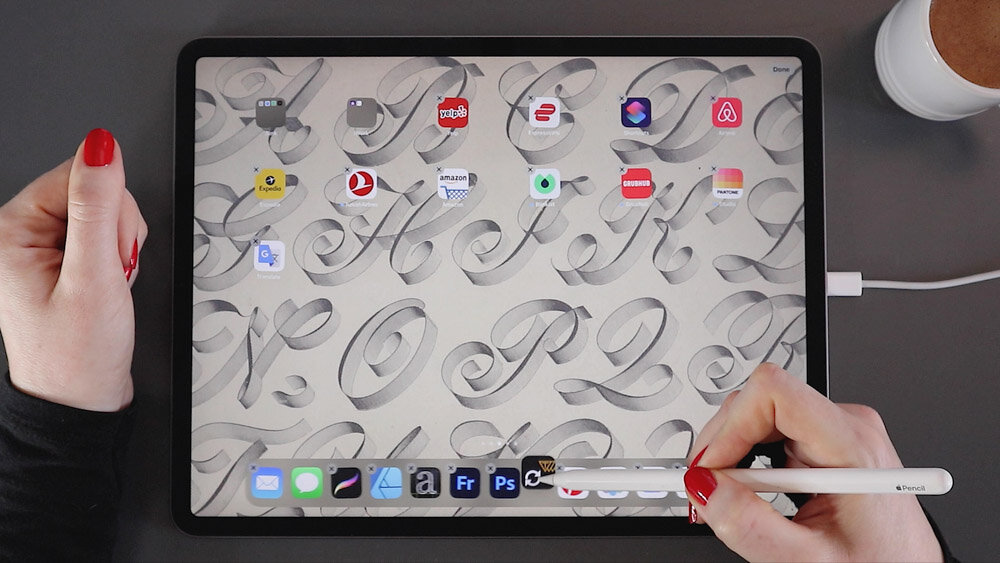
Now, no matter what cloud service you have, it's going to be very important that the icon to access that cloud app appears here in your iPad bottom toolbar.
First off, I want to note that the iCloud icon is actually a blue folder, and the app itself is called Files, which can understandably be a little bit confusing. I personally use both Google Drive and iCloud. So here in my toolbar I have my Drive and my iCloud (or Files) app icons. Now, if the icon of your cloud app is not yet in this bottom toolbar, we're going to have to add it before we install any files in Procreate.
To add an app to your bottom toolbar, you're going to press and hold it, then tap “Edit homescreen”. Your apps will begin to jiggle. You can then just simply drag and drop your cloud app into the toolbar. Then to make them stop jiggling, just tap anywhere.
Open split-screen view
We have to be in a Procreate file to install brushes. You can't be in your gallery, so just make sure that you open any file before we get started with installation.
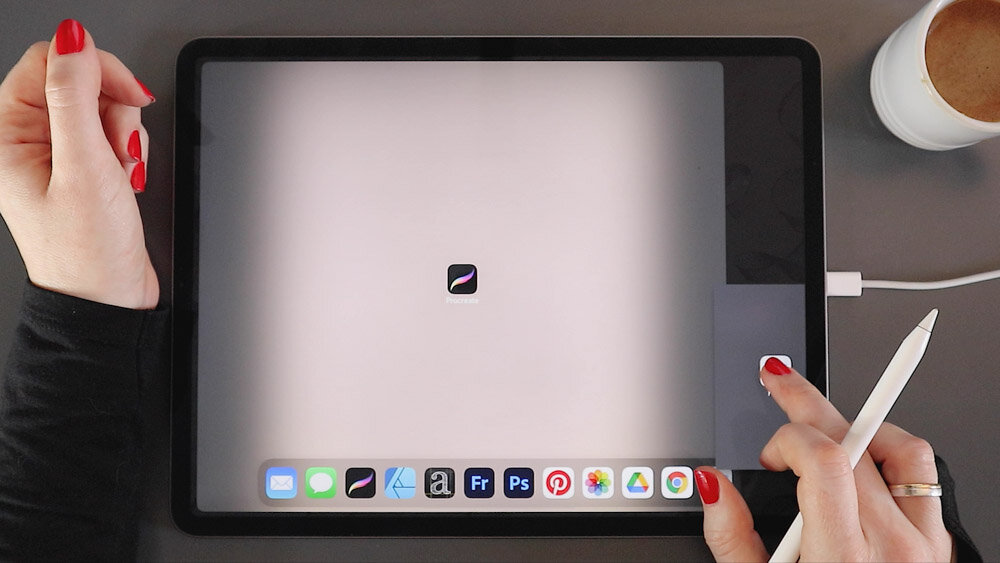
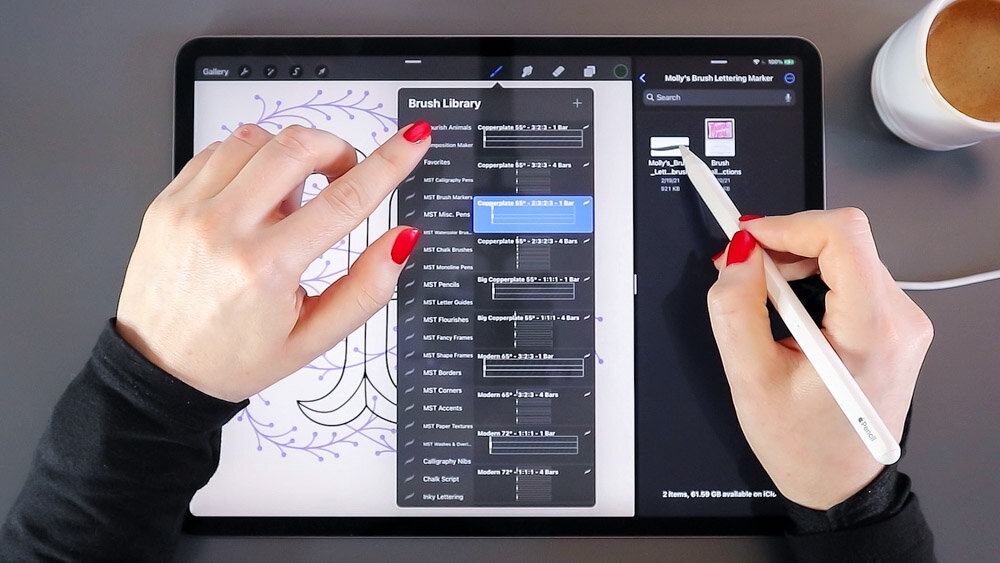
Next, I will lightly swipe up from the bottom of my screen – not so much that I return to my home screen – and this toolbar will appear. Now I'm going to take my preferred cloud app (I'm using Files since that's where I just saved my brush) and I'm going to drag it up to the side of my screen. I can choose the left or the right side. Now I'm in split screen view and I can toggle the ratio of my split screen using the center toggle bar. My files are opened to the last place that I was using it, namely in my brushes folder. But you can still use the navigation here to navigate to your preferred folder.
Install Procreate brushes
Now over here in Procreate, I just open my brush palette. It used to be that you had to drag and drop a brush file over into your brushes library, but it's actually even easier now because Files can detect a Procreate file. All you have to do is tap it now once. That marker just got instantly added into a folder called Imported! Had this been a .brushset file, I could have tapped it and it would have popped over to Procreate as its own brush folder, rather than being in the imported folder.
Now I can close my files out by just dragging the center toggle all the way off to the side and I can test out my new marker.
Install Procreate color palettes
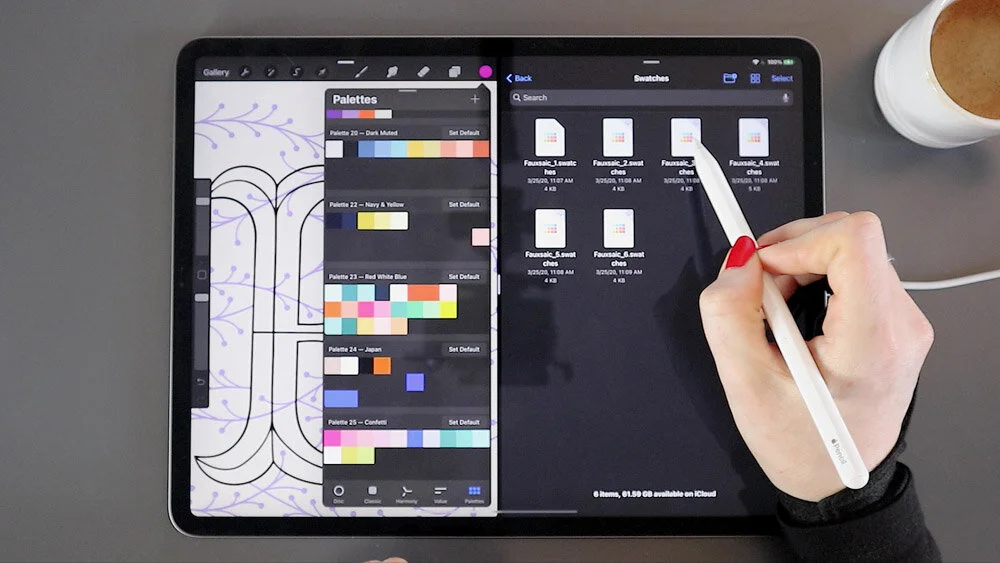
These same steps work whether you’re using iCloud, Google Drive, or Dropbox. You can use the same split screen function with any of those cloud apps. These steps also work for color palettes, Procreate color palette files end with the file extension .swatches. So I just come over to my Procreate palette library – this last tab here – and I'll just scroll down to the bottom, because when I add a new swatch palette, it's going to add to the very bottom.
Now all I do is tap one of these .swatches files in my Files app and there you go – it appears right there in my palette library. I can now drag and move it anywhere in my library that I would like.
Install Procreate files
Finally, the last type of file that you may need to import into Procreate are Procreate files themselves. These files end with the file extension .procreate.
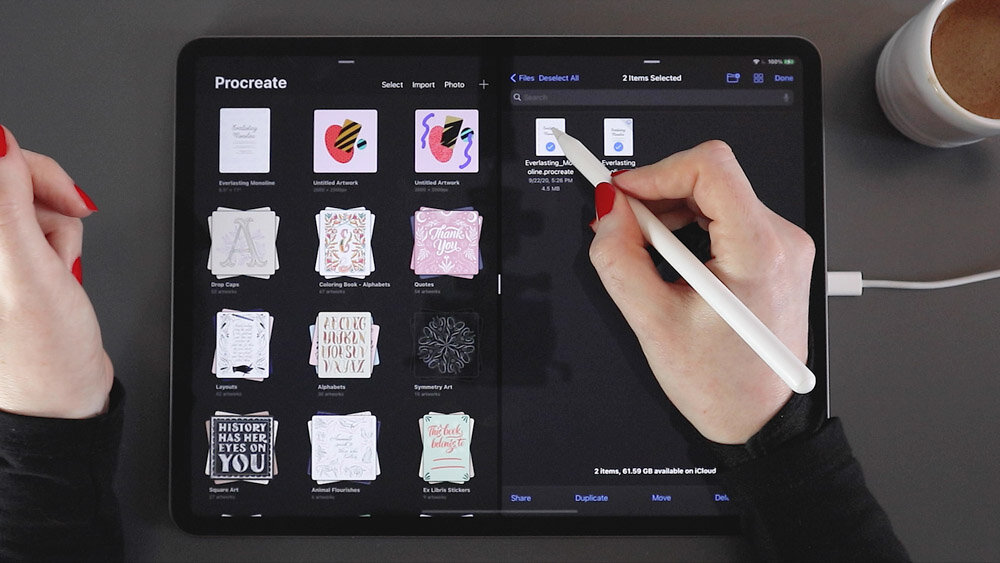
Installation of these is the same as the brushes and swatches, except that you have to do it in the gallery, not within a file. You can either do it in your main gallery or within a stack. So here in my cloud, I have navigated to a folder where I have a .procreate file, and I can just tap it or drag it over. As soon as I do, it appears right in my main gallery as the first file.
If you ever have multiple files that you want to import into your gallery at once, you can click Select, choose all the ones you want, and then drag them over to your gallery.
If you enjoyed this lesson, enroll in the full course: Procreate for Absolute Beginners. Register and unlock your 1-month free trial to Skillshare Premium using the link below. (There are no strings attached to the trial – I promise – so it’s a pretty great deal!)
Brushes shown in the video:
Calligraphy Composition Maker for Procreate
Molly’s Lettering Marker Brush – free in my Lettering Toolkit
iPad tools used:
Procreate App
12.9" iPad Pro
Apple Pencil
Touch screen glove
More Procreate tutorials:
Procreate for Absolute Beginners – 2-hour Skillshare class!
10 Procreate Pro Tips for Artists
How to Get Perfect Strokes in Procreate
How to Illustrate Lettering in Procreate
iPad Calligraphy: Recommended Tools

