10+ Procreate Hacks & Shortcuts for Lettering Artists & Illustrators
I earn small commissions for purchases made through links in this post. Proceeds help me to continue producing free content.
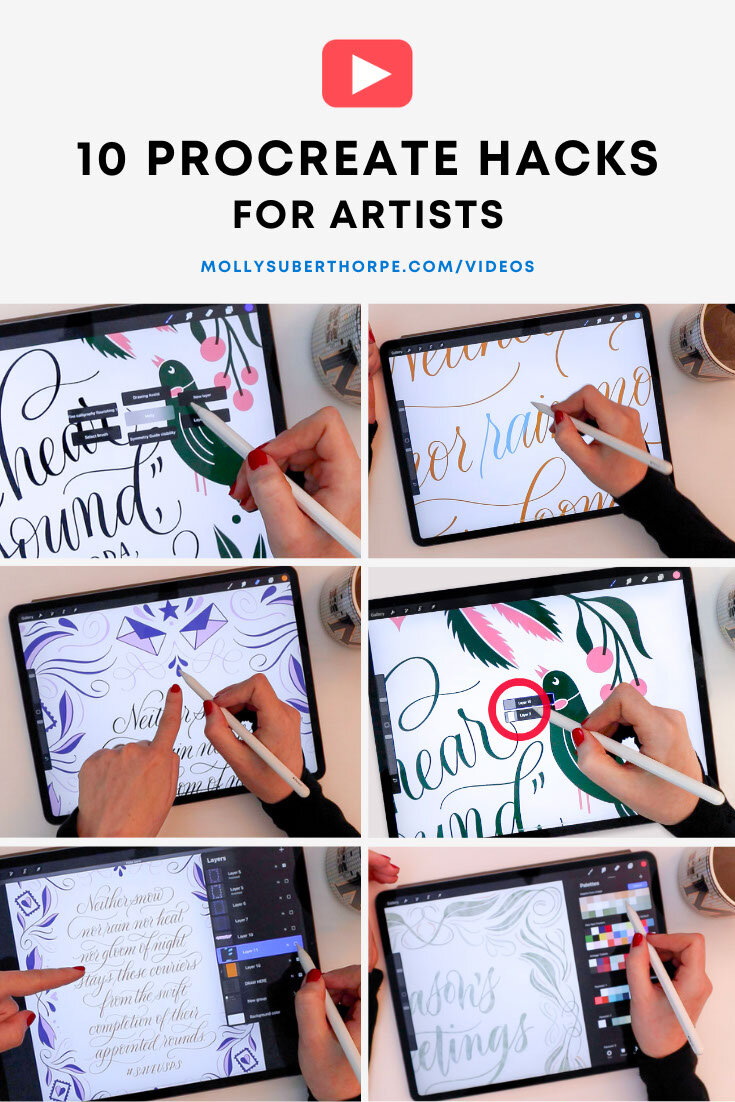
Today I’m sharing my most-used Procreate hacks, shortcuts, and actions that streamline my lettering and illustration process. The Procreate app for iPad Pro is a powerful tool, and version 5X got even more powerful. There are hidden gems that aren’t always intuitive or obvious, but once you discover them, you’ll see just how much they can transform your workflow!
Video
In the video below, I share techniques that I use as a lettering artist, who also does simple illustrations. The Procreate app is a really powerful tool, and just like most powerful software, there are little hidden gems built into the program that aren't always intuitive or obvious. But once you discover them, you realize just how much it can transform your workflow.
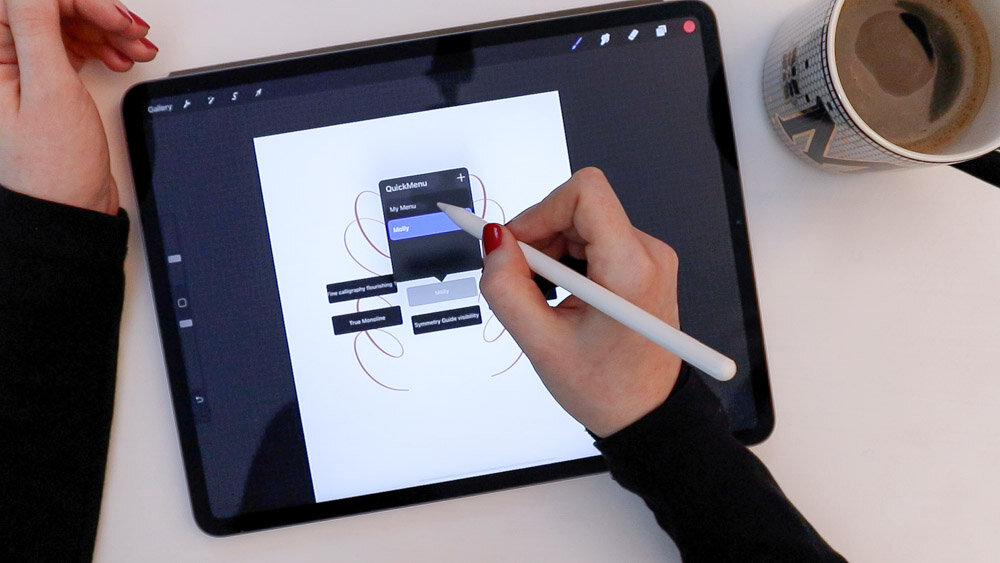
Quick Menu Setup
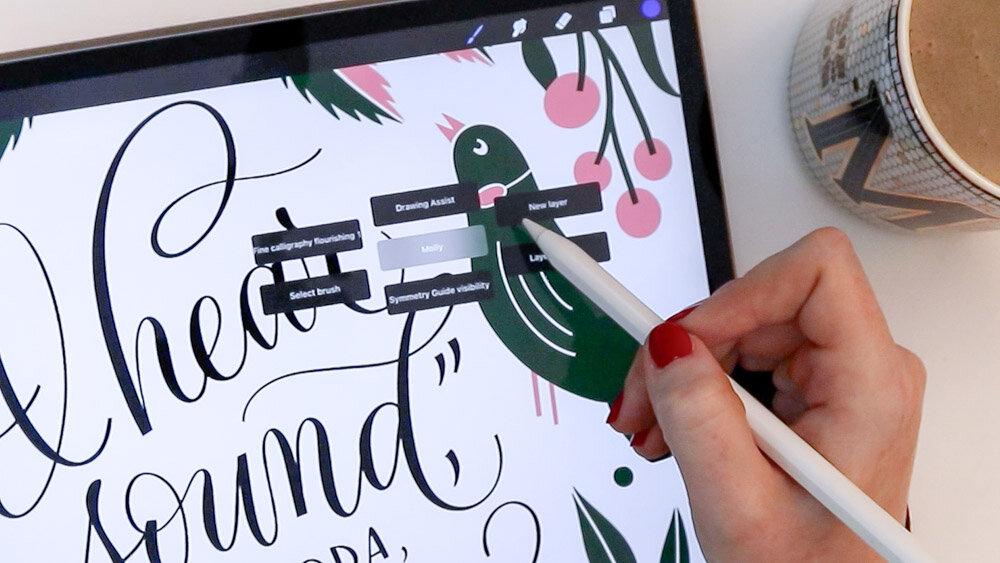
To get us started, I’m going to talk about a popular new addition to Procreate, which is the quick menu. I’m going to start by showing you my own quick menu setup, then show you how to customize your own for your own needs.
My quick menu is set up so that if I press any finger on the screen and hold it, I get this pop up menu. Now, what I have set up here are the six most frequently-used actions that I do when I’m making art, and all of these actions – because they're here – I mean that I don’t have to be moving around the screen, opening other menus, scrolling for certain options just to make those actions happen. You can imagine just how much faster this helps me do my work!
Brush Selection Shortcut
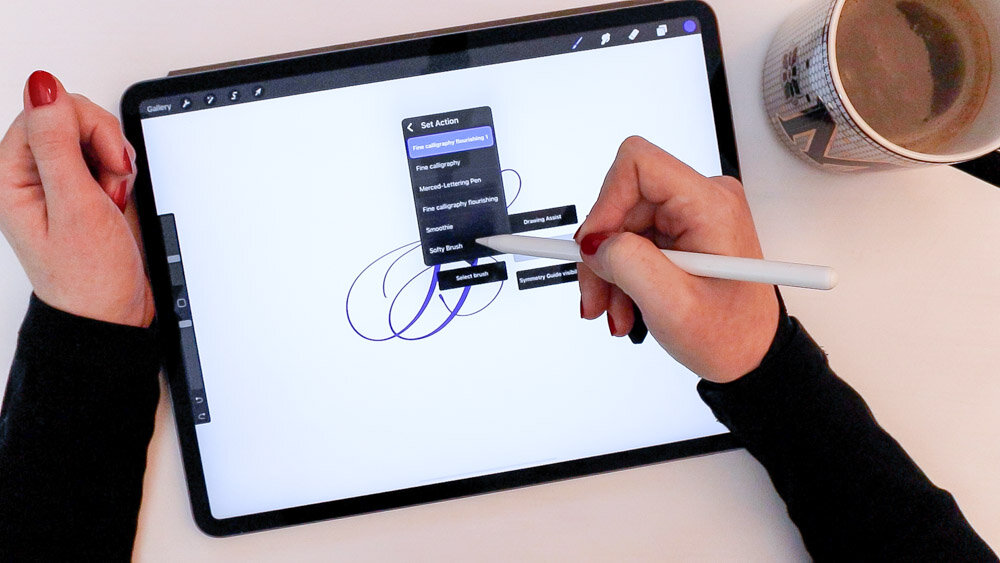
So number one here, that I have programmed, is my absolute, all-time favorite brush. I’m going to make a new layer here so that I can just draw a little bit and just show you as I go.
I’ll press and hold quick menu. Then I'll come here to my favorite brush, my fine calligraphy flourishing brush. So now let’s say that I want to change my brush. I’ll just bring up my quick menu again and go to my second saved action – which is “Select brush” – and hold it for a quick second.
This brings up my entire brush library. Every brush pack that I have in my library can be accessed through this mini menu now. And what I’ve done in my own library is create a folder specifically for my favorite brushes, and I have that at the top so that when I enter this mini menu, the very first action – the very first selection – is my “Favorites” brush folder. I can I come in here and I can select any brush now.
So what if, let’s say, I want a monoline brush now. Well, I’ve selected that. And I’ve instantly moved over to monoline, but now I want to quickly go back to the calligraphy brush. You can see how easy that is, and how much faster than going into the brush menu, selecting it, going back to the menu, etc, etc.
Drawing Assist & Symmetry Shortcut
Brush shown: Fine Point Calligraphy Nib – Smooth
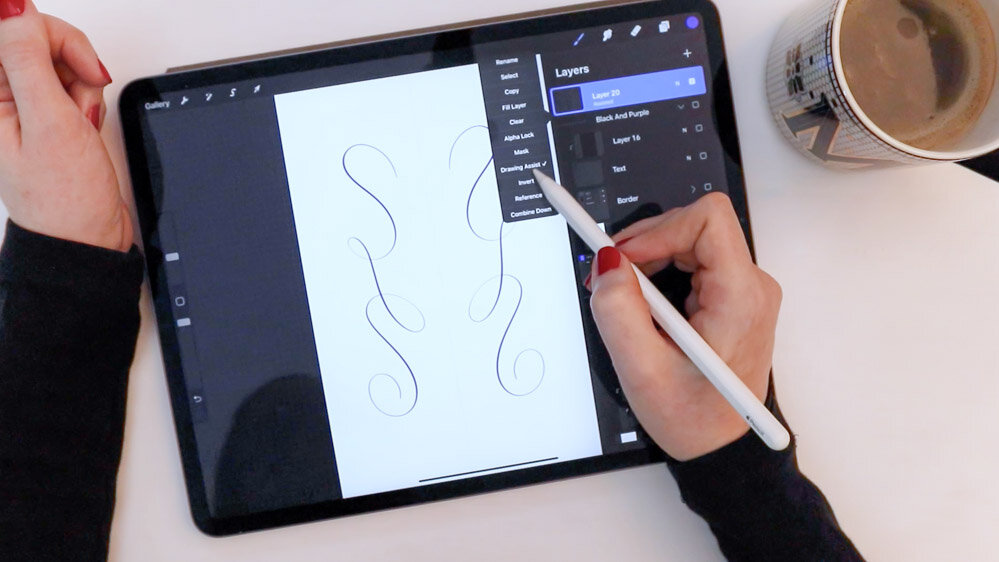
Next up on my quick menu is Drawing Assist. This is really useful for adhering to guidelines or using the symmetry guides. If you’ve seen any of my videos that utilize the symmetry guides (full playlist here), you'll know that Drawing Assist is crucial. So if you have a layer where drawing Assist is turned on, the word “Assisted” appears right below it.
Let’s go to Settings and turn on Drawing Guide, then click Edit Drawing Guide. Now let’s turn on some symmetry. (It doesn’t matter for the sake of this video what the symmetry settings are.) Now, with Drawing Assist on, whatever I draw gets duplicated according to my symmetry guide settings.
If I tap my layer once, I can hit “Drawing Assist” to turn it off. And now, whatever I draw does not adhere to those guides. So in my own work, I do this a lot. Let’s say I’ll be working in symmetry and I’ll be trying to draw adhering to the guides, but then I quickly need to go in and do something without the guides. Well, instead of coming over and tapping the layer to turn off Drawing Assist, all I have to do is press and hold Drawing Assist. Now it’s on. Press and hold again, tap Drawing Assist again, and now it’s off. You can see how, again, that can really streamline my workflow.
Take the guesswork out of digital watercolor lettering, whether you’re creating flourished calligraphy styles or free-flowing brush script.
Layer Shortcuts
Next up in my quick menu is “New Layer”. Needless to say, this is a very common function. So I can tap that and a new layer appears.
And last, in my quick menu, I have “Layer Opacity,” which is, again, something I use a lot, especially if I’m tracing or just layering my artwork at all. So if I go to layer opacity, you can see that the opacity slider bar appears at the top, and with my pencil or my finger, I can tap and drag. And you can see that the opacity is adjusted.
How to set up your custom quick menu
So how do you set up your own quick menu options? Well, first you have to make sure that your quick menu is enabled and figure out what action you want to take to make the menu appear. Like I said, I press and hold and that’s the way I prefer to have my quick menu pop up.
Go to your Settings and hit Preferences, then come to Gesture Controls. Quick menu is one of the options in Gesture Controls, so you'll select the way to invoke your quick menu. Then you'll come out to your canvas and you'll invoke it – you’ll open your menu.
If it’s your first time using it, this is what you’ll see. You’ll see the default menu and it will be called “My Menu,” I believe. And I think as defaults it comes with all of these very popular actions. But if you want to customize them, you can create multiple quick menus. You can tap and hold the center title menu and say new. Now, coming into this new menu, I’m tapping for a second and holding my action. And I can scroll through this long list of actions. Let’s select “New layer” here and let’s select “Open Layers” panel there. Now, when I bring up that quick menu and tap “Open Layers,” the layers panel opens!
You can create multiple quick menus for yourself, too, if you feel that you're inhibited by just these six options.
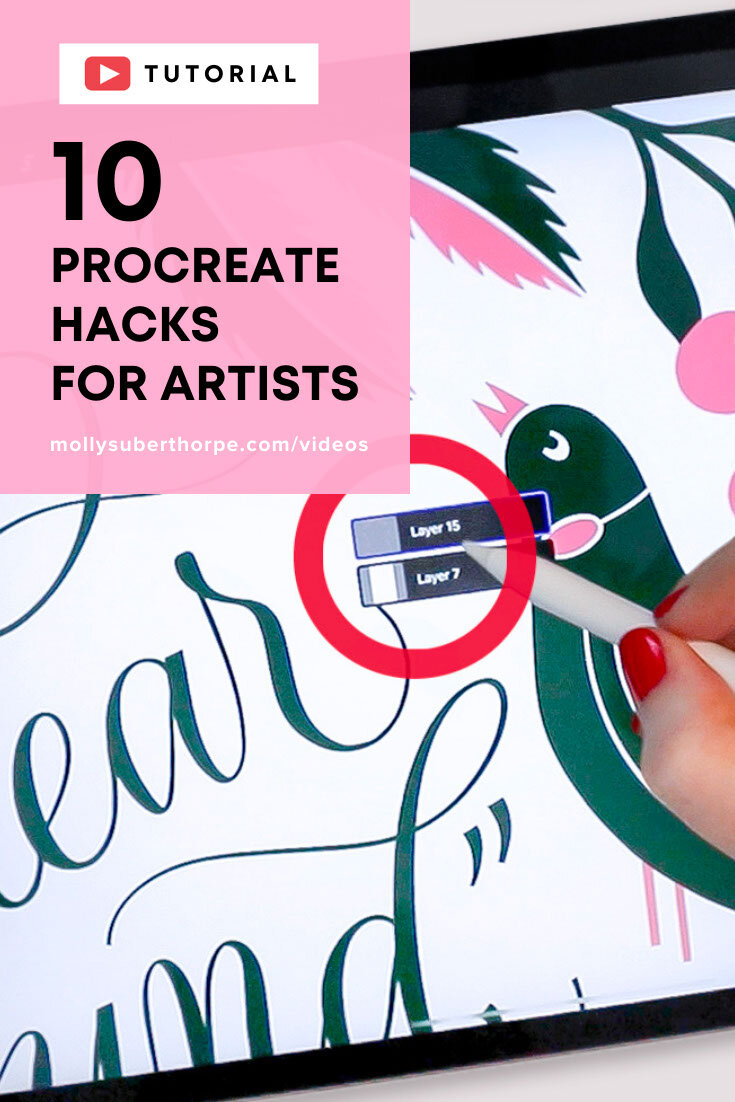
Layer Selection Shortcut
Okay, so this next one is a real life changer for me. I don’t hear a lot of people talk about this one, and I’m not sure if that's because it’s a pretty hidden feature that you have to really look for, or if not everyone finds it as useful as I do.
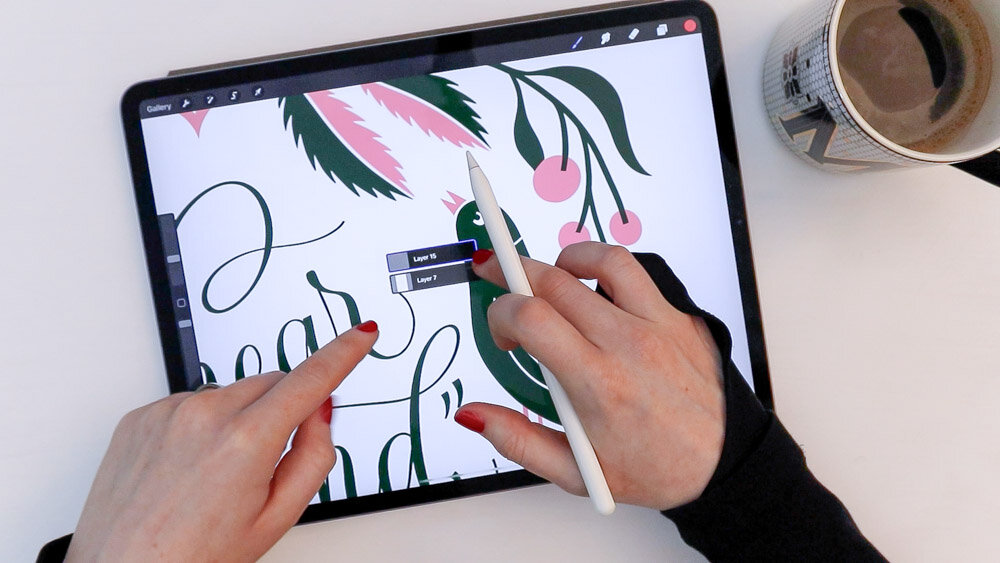
Here I have a file that has multiple colors and multiple elements. And when I make files that have lots of colors and elements, I put pretty much every element on its own layer – certainly every color. I’ll put calligraphy on one layer and I’ll put illustrations on other layers. So I end up with files where I have lots and lots of layers. If I want to navigate to a specific item like, let’s just say, this pink circle here, I can go into my layers palette and I can really look around for it. You can see I just have so many layers that, even now in this video, I don’t even know where it is. It would take me a while to find it.
So back in Gesture Controls, I can come over to Layer Select and I can choose one of four ways to invoke the layer selection tool. I have the first one always selected, which means that a finger touch will invoke layer select. What that means is that I can just put my finger down and instead of pushing hard and holding to open quick menu, I can just hold and scrub around the screen and you’re going to see that the layers that I’m hovering over each appear.
And then if I hold for a second more – if multiple layers are layered on top of each other in that exact spot – then it will show you a mini menu of those layers, and you can navigate straight to that layer. So now I know that any drawing I do is going to be only on that layer.
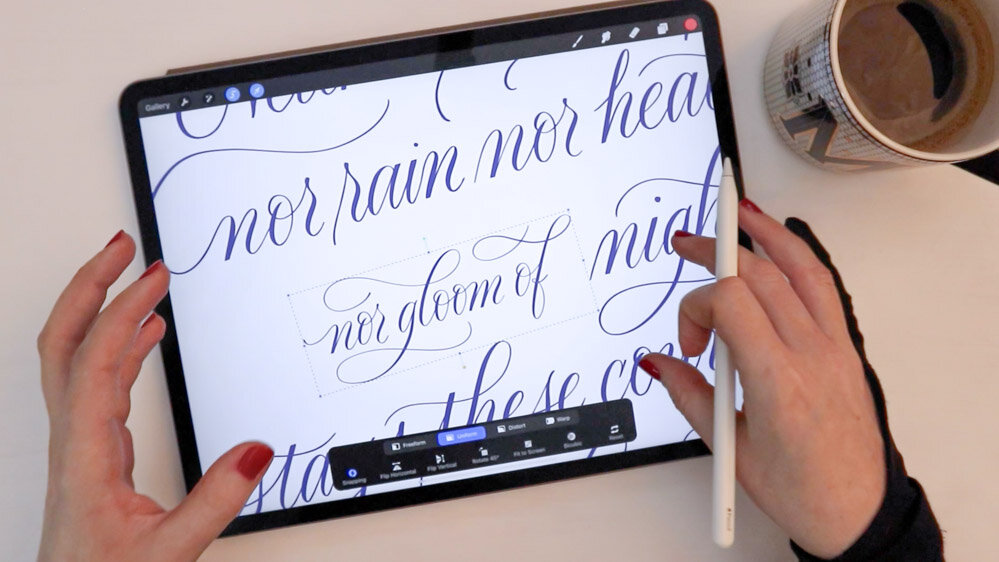
Selection Zooming
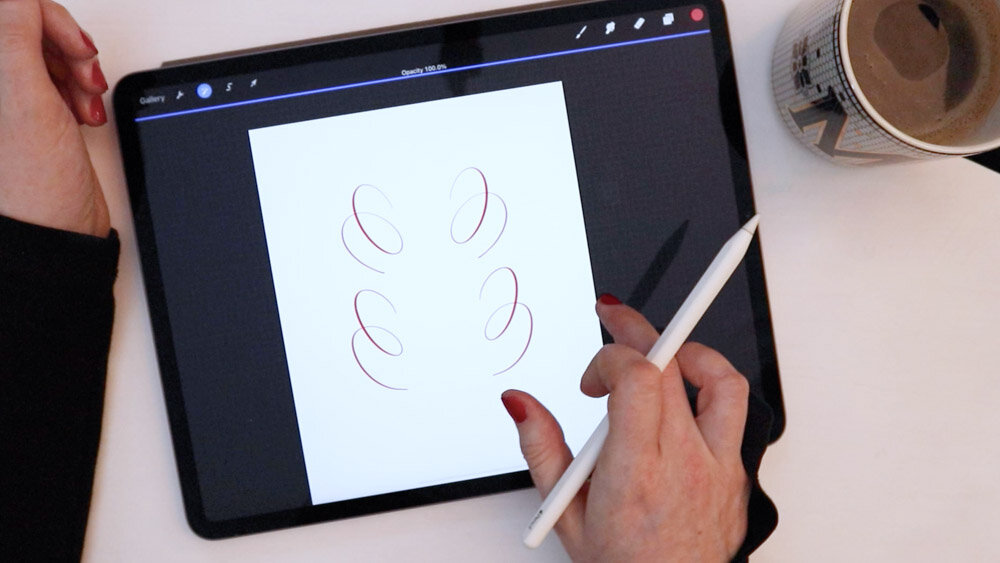
Now I’m going to talk for a moment about selections. You may already know this first one, but it’s a small thing that makes a big difference. I’ve come to my selection tool and I just want to select these three words because I want to move them, let’s say, slightly to the left.
Brush shown: Fine Point Calligraphy Nib – Smooth
Okay, so I’ve selected them here. And now I’ve moved over to my Direct Select tool so that I can adjust the size – or spacing – of them. But now I want to actually zoom out to view my whole composition because I don’t know if the spacing that I’m going to do works for the composition as a whole.
Well, if you pinch right here on the selection, as you would to zoom out, it affects the actual transformation of that selection. So the little tip that I have here is that you have to pinch and zoom outside of that selection, and only then work with the selection itself to change it. It’s kind of minor a minor tip, but it can be a big deal! I know that before I learned that, I found myself deselecting, zooming out, and reselecting. I didn’t realize that it was so easy to zoom while a selection was made.
Recoloring Artwork Three Ways
Now I want to talk about recoloring your artwork in a couple of quick ways. So, number one, I have here my calligraphy and it’s black because when I originally drew it, it was black. But I want to change it to something even higher contrast. Let’s choose this gold that I have preselected here. So the quickest way to do this in a non-destructive way – meaning I can preserve the original black and I’ll make an editable color layer that fills it in – is with a clipping mask.
So I’ll come over to my layer that has the calligraphy on it and I’ll tap the new layer icon, then tap the new layer once and select Clipping Mask. You’ll see that a little arrow appears in the lower left, which means that this clipped layer only affects the layer below it, that it’s clipped into. And now with my gold swatch still selection, I’ll tap again and I’ll say “Fill layer.” You will see that the calligraphy turns gold.
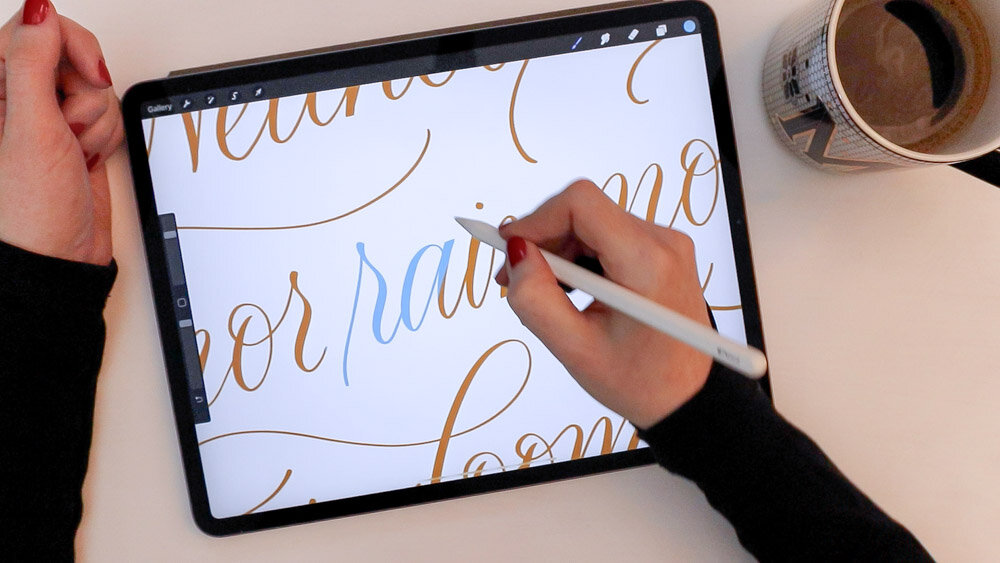
Now, this by itself isn't really a hack. I think lots of people do know this. But the cool thing comes if you want to make a multicolor piece of artwork. Let’s say I want to change the words ‘rain’ and ‘night’ to different colors. Let’s make a new blank layer. Let’s call it the accent color layer. We’ll tap it once and make it into a clipping mask. But instead of tapping again to fill it, I’m going to use either painting or the selection tool to quickly recolor.
So how do I do that? Let’s choose a very high contrast color here (light blue). The painting method is pretty easy on this blank layer. I will select any brush that I would think is good for painting and then I will zoom in and start painting on that new blank layer. Remember, this only affects the calligraphy layer, meaning that I'm basically painting just the calligraphy itself. If I now come into this layer in the menu, you’ll now see that I basically painted a big puddle of blue on the page. But if I unclip the layer, you can see what I painted. But when I click it again, it only affects the pixels of the calligraphy. And that is why I only colored the calligraphy.
But it can be tedious to go through and paint large amounts of accents, so we can use a really cool little hack by using the selection tool. So I’m making sure I’m on that blank layer. I’m coming to my selection tool and choosing Freehand and Color Fill in the section settings menu. I’m going to zoom in and start making selections of the words I want to color. So the second that I close the selection, it should turn blue. Indeed, I don’t even have to remove my selection because I also have Add turned on, so I can just go around and continue selecting. And you'll see that each item gets colored in according to what I selected. Right now, I can zoom out and I have these pops of color within my calligraphy and I can quickly turn them on and off here, so it's a totally non-destructive edit.

⭐ ⭐ ⭐ ⭐ ⭐
“Absolutely perfect. I’ve been looking for smooth, natural-feeling calligraphy brushes, and these are it. I’ve tried so many other brushes, but am super excited to finally have this one.
— Angela Southern, lettering artist
Add, Subtract, and Fill Shapes
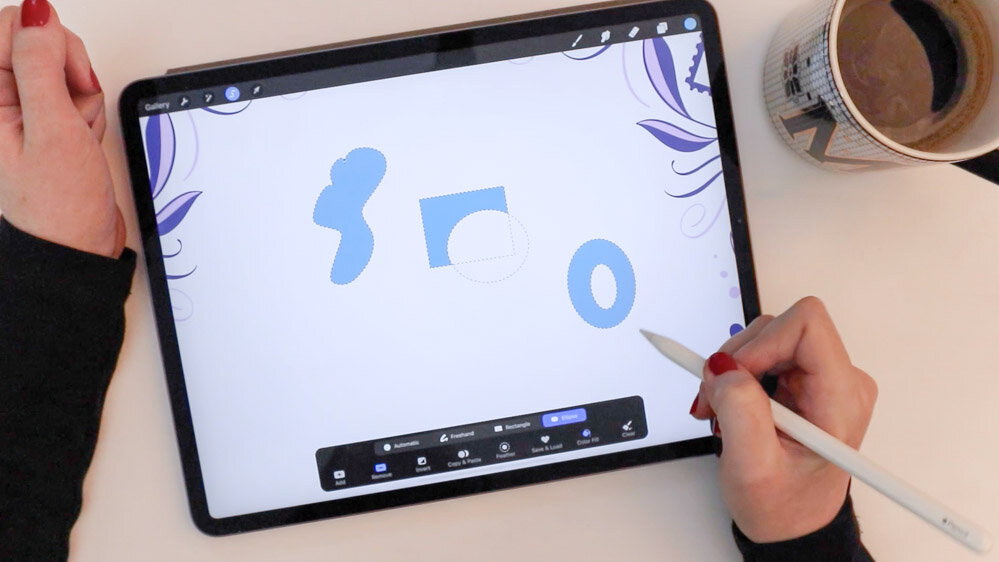
Likewise, I can make shapes that color fill very easily. So I’m on a blank layer now. And coming to the selection tool, I can draw freehand shapes. And the second that I close the selection, it’ll fill with my color. I can also use the rectangle tools and fill them, or I can use the ellipse tools and fill them.
I can even remove color that way by changing from Add to Remove, keeping Color Fill on. There, you see with the ellipse tool, I have been able to cut out of my selection. This is pretty convenient if you're making fun illustrations, let's say, with some geometric shapes.
Select, Group, and Delete Multiple Layers
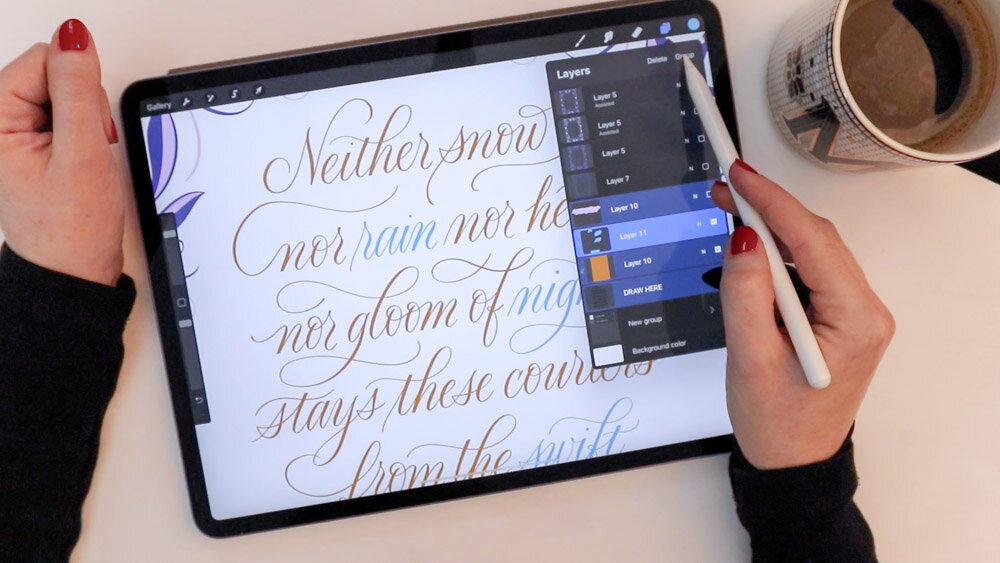
One final selection-related technique that is really crucial to my workflow is selecting multiple layers at once. It can be helpful if you’ve made a ton of layers and let’s say you want to group them so that you can edit the group as a whole. You can select multiple layers by swiping quickly right on all the layers that you want to select. So you select them all. And now I’m going to click Group up at the top. (You can also use this to delete lots of layers at once.) And now I have a group from what I selected and I can adjust that whole group together as one. It's very, very convenient.
Color Fill Using Color Threshold
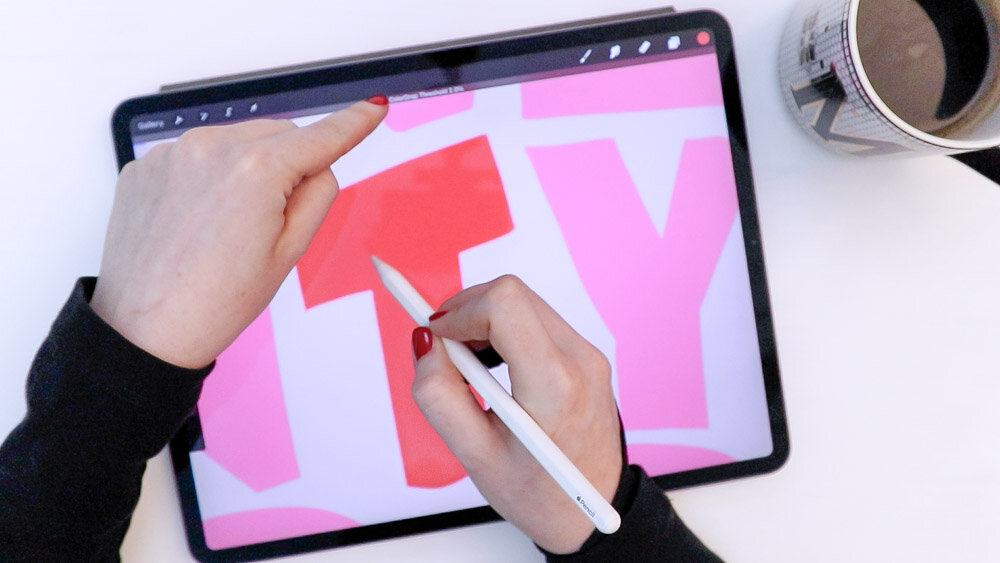
Next, I want to talk a little bit about quickly filling in selections. I think that probably most of you know that if you drag the swatch from your color palette over and you fill any shape, it automatically fills that enclosed shape. But what if you have used a brush that is rough or blurred on the edges? Then you’re going to get this little bit of blur around the edges of your fill, and it will look wonky. Either you have to go in and fill it by hand or recolor it in some other way.
But there is a little trick to get around that. And it is that if you click and drag your shape and you let it fill in, then you don’t let go, you’ll see that it says “Color Drop Threshold” at the top. And so again, without letting go, move across the screen and your selection is going to fill in. Let me zoom in and do that again. Do you see how now this fill is pushed all the way up to the edge, and I don’t have that little pink border anymore? Now I’ll do it once again, zoomed out. You’re going to see that if I make the threshold really big, it actually fills all the color on my screen. So this is an extremely helpful tool for filling in illustrative brushes that don’t have crisp and sharp strokes.
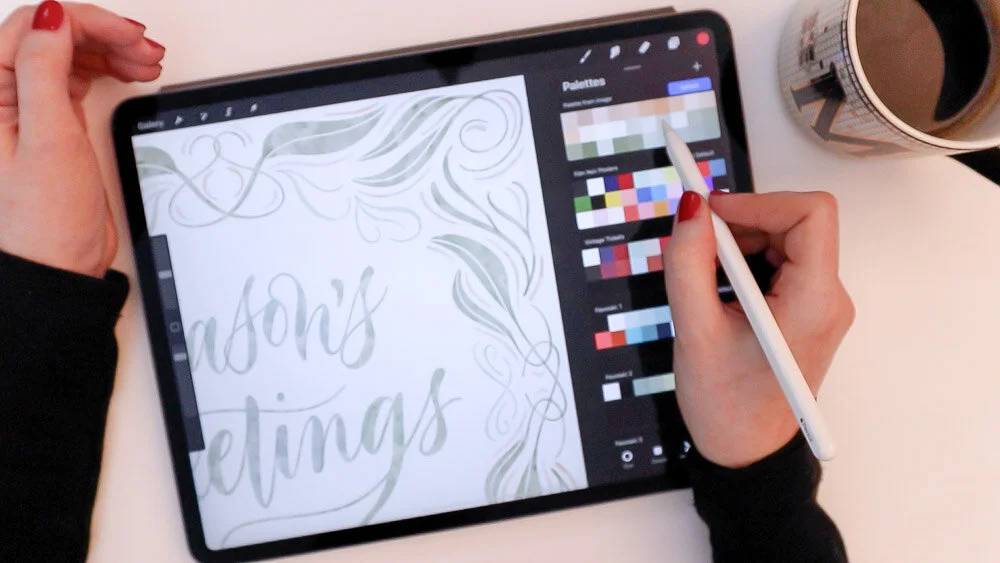
Automatic Color Palette Creation
One more cool color hack is that if you’ve made a piece of art that has colors in it that you really love, and you want to be able to save that palette in a way that you can use it again for the next piece of artwork, you can now very quickly and automatically create a color palette.
Brushes shown: Watercolor Script Procreate Brush Pack
Up here in color palettes, if I hold the plus sign, you can now select New from camera, New from file, and New from photos. For some reason, they still don't have a new from canvas option, so I can't take the file I’m looking at right now and just turn it into a palette. But there's a quick way around that. All I have to do is go to Settings > Share as JPG, save the image, and now it saves to the photo roll on my iPad. Now that it's a photo, I can just come to the color palette plus sign and select New from photos, then select my new JPG. And immediately, a palette is created using all the colors – and all the slight variations of color – from this piece of artwork!
I very much hope that these little tips and tricks help you in your own workflow. If there are any specific Procreate hacks or techniques that you use daily in your workflow that I didn't cover here, feel free to share them in the comments because I always like to learn new ways to make the most out of this software. As always, tag me in your work on Instagram so that I can see what you're up to.
I love to see what people create from my tutorials, my books and my downloads. And remember that you can have access to my Free Lettering Toolkit resources! I'll be back next week with a new video. See you then!
Resources
Free practice sheets & Procreate brushes:
Molly’s Free Lettering Toolkit
Tools used:
Calligraphy Nibs Procreate Brush Pack
Procreate 5X App
12.9" iPad Pro (4th Generation)
Apple Pencil
Touch screen glove
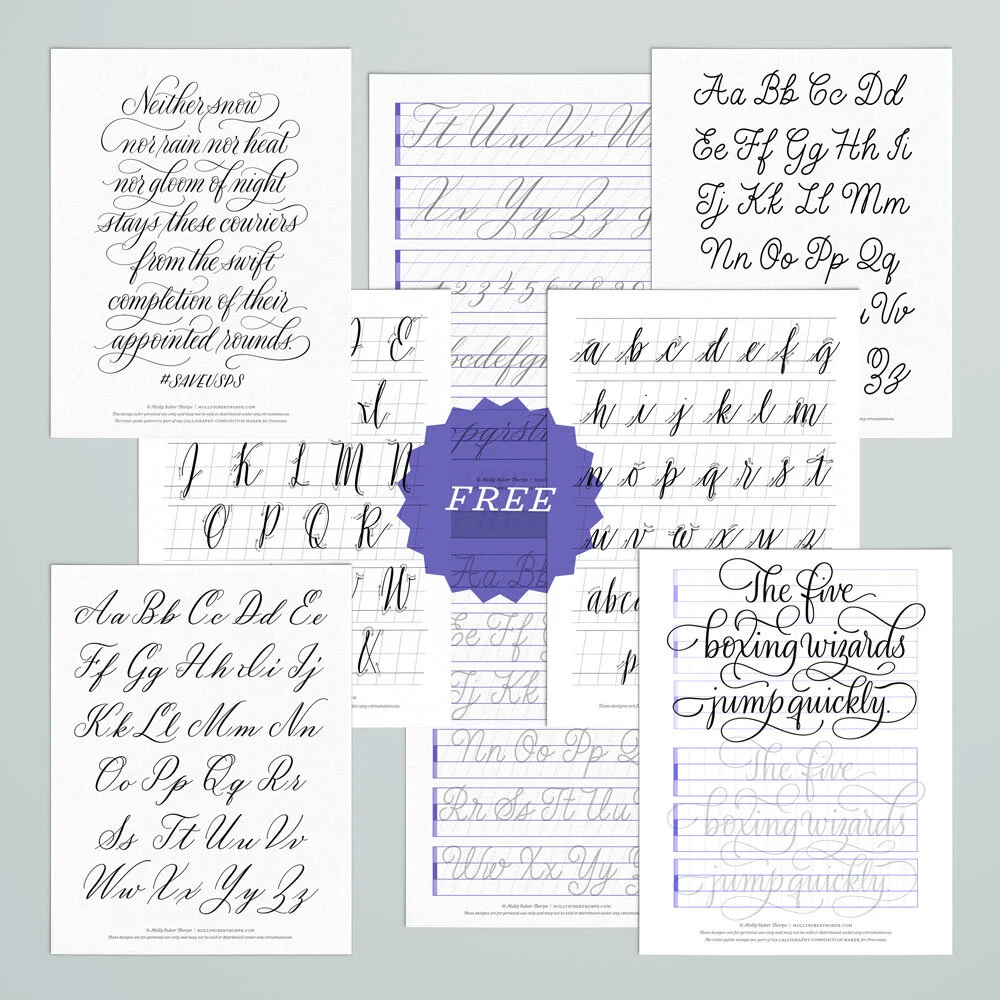
Download my FREE Lettering Toolkit
Molly’s Lettering Toolkit is my free hand lettering bundle that’s always growing. I release a new free download roughly once a month, and add it to the ever-growing toolkit. This is an exclusive perk for my subscribers, so use the button below to register today and gain lifetime access.
Check out my favorite Procreate brush packs: